
KINDLE TEXTBOOK CREATOR
Amazon’s new free tool, the Kindle Textbook Creator, is very convenient for e-textbooks and other e-books with rich formatting and complex layouts.
(Illustrated children’s e-books work better with another free tool, the Kindle Kids’ Book Creator, and comic books work best with the free Kindle Comic Creator. However, books that primarily consist of paragraphs of text, such as novels, function best as a simple conversion following Amazon’s free guide, Building Your Book for Kindle.)
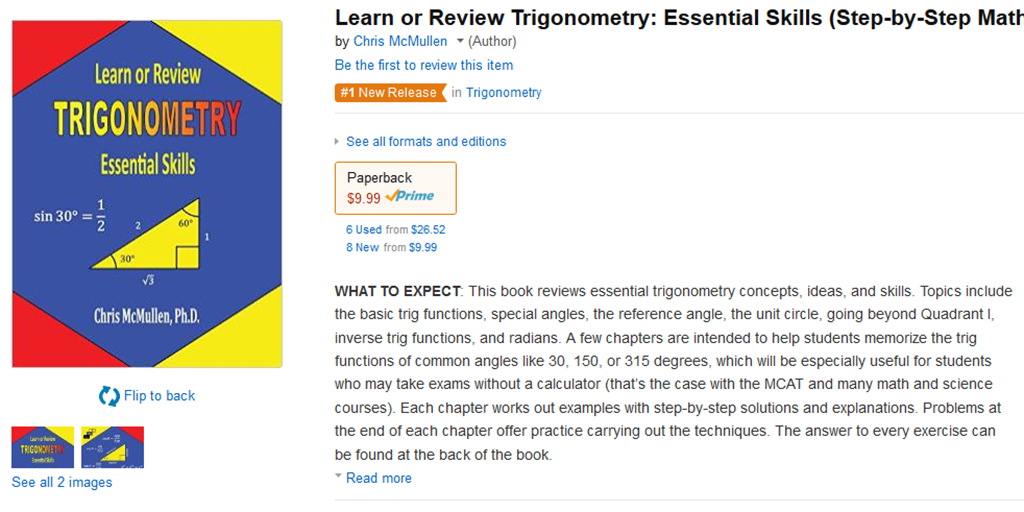
I recently published my trigonometry book, Learn or Review Trigonometry: Essential Skills, using the Kindle Textbook Creator.
I did more than simply upload my print PDF to the Kindle Textbook Creator. I spent a little time modifying my file in order to optimize it for the Kindle Textbook Creator. Later in this article, I will show you exactly how I did this.
If you would like to see an example of an e-textbook created using the Kindle Textbook Creator, feel free to check out my trigonometry e-book and see how it looks: https://amzn.com/B0106X7NL4. Note that the Look Inside shows the paperback edition. (Update: That may change soon, as KTC published books are beginning to generate automatic Look Insides.) If you want to explore the Kindle e-textbook, download the free sample to a device, or download the free sample with one of the Kindle apps (like Kindle for PC); you’ll get the best experience with a Kindle Fire HD.
But remember, your book won’t look quite the same unless you take similar steps to optimize your file before publishing.
PROS AND CONS
Here are the benefits of using the Kindle Textbook Creator to format an e-textbook:
- The strongest benefit is convenience. You put a PDF in and very quickly get a Kindle-friendly e-book out. (Unlike conventional Kindle e-books, PDF actually converts very well in this context.) The alternative, converting a complex layout with rich formatting into a reflowable e-book, is very tedious and time-consuming. Many e-textbooks don’t sell frequently enough to warrant weeks of work on the e-book conversion (or paying a hefty fee to have the conversion done for you).
- The output is amazingly good for starting from a PDF file (usually, PDF is the worst file to begin with to create an e-book, but this is an exception). The structure of each page is preserved, which preserves the complex design and layout of most textbooks, yet it’s much better than just converting every page to a picture. The device will recognize the text on each page, which would never happen in an image. In my experience, images can come out nice and sharp, much better than converting each page to an image (but you need good quality to begin with).
- Students can highlight text, make notes, and use similar features that are very handy with e-textbooks. For example, if you highlight a word on the screen, the device will pull up windows for a dictionary, Wikipedia, and even translation. There is even the potential for flashcards.
- The e-book will support pinch-and-zoom. This is a necessity when text or images wouldn’t be readable on the screen, which is possible, since the screen size may be much smaller than the page size of the printed textbook. Pinch-and-zoom is what makes the Kindle Textbook Creator viable.
- You can add navigation to your PDF file so that Kindle devices will have a working table of contents on the device (but not a clickable table of contents in the e-textbook).
- Audio and video clips can be added into the e-textbook using the Kindle Textbook Creator. That’s pretty cool.
- A new feature recently added is an image pop-up. Most of your images you probably want to show on the page rather than to pop-up, but if for some reason you want to insert an image file and have the image pop-up, that is possible now.
Not everything is ideal, of course:
- E-textbooks created using the Kindle Textbook Creator are only supported on limited devices:
- Kindle Fire HD 8.9″
- Kindle Fire HD
- iPad
- Android Tablet
- PC/laptop using Kindle for PC
- Mac using Kindle for Mac
- Smartphones: maybe (Kindle for iPhone and Kindle for Android Phone are listed on my product page, but these options were removed from the Kindle Textbook Creator’s preview, so they may not be available for all e-textbooks made this way)
- First and second generation Kindle Fire: maybe (these formats are listed on my product page, but again, they don’t show up in the preview)
- The Kindle Textbook Creator does not support e-Ink devices, such as Kindle DX and Paperwhite
- Audio and video features are not yet fully supported. Presently, they are only supported on third-generation Kindle Fire tablets.
No Look Inside is available for e-textbooks created using the Kindle Textbook Creator.Update: As of December, 2015, KTC published books are beginning to generate automatic Look Insides. I published a KTC book on December 18, and on December 19 it had its own Look Inside on Amazon’s website (FYI: there is no print edition, and it has no ISBN). The Look Inside is an important selling feature. Customers can download a free sample to supported devices, though it’s not nearly as convenient as a Look Inside. The remainder of this paragraph may now be irrelevant. [However, if you have a print edition of your textbook (you can make one using CreateSpace), you can get the print and Kindle editions linked, in which case customers will see the Look Inside of the print edition. (This may not be automatic. You might have to place a request through the Contact Us feature of KDP. It can also take weeks for this to be activated. Be very clear in your request. If they think you’re asking for a Look Inside, they will tell you that e-books made with the Kindle Textbook Creator don’t get a Look Inside. What you want is instead for the Look Inside of a linked print edition to show for your Kindle e-textbook on Amazon.)]- If the text is so small that customers must pinch-and-zoom to read, this can become quite tedious if customers must pinch-and-zoom to read every page of the e-textbook. Some textbooks are very expensive in print, so substantial savings with an e-textbook may help to offset possible inconvenience. However, if the text is somewhat small, it’s not too hard to enlarge the text. I’ve done this and will show you how later in this article.
- Kindle’s page numbering may differ from your page numbering, so if your pages have numbers or if you include a table of contents with page numbers, this can be confusing. However, it’s not too hard to either remove your page numbers all together (as you don’t really need them in an e-book) or at least change your page numbering to match Kindle’s page number assignment in the navigation. I go into further detail later in this article.
- File size is a possible issue, but it depends. I just published a 127-page trig e-textbook with about 60 images, and file size wasn’t an issue for me. My PDF file was 3 MB, the Kindle Textbook Creator made a 6 MB file, but all that really matters is that the final converted .mobi file size was back down to 3 MB. (It’s common for the final .mobi file size that you find on page 2 of the publishing process at KDP to be significantly smaller than the .kpf file that you upload to KDP. When you see the .kpf file size, don’t worry about it: Wait until you reach the pricing info page to find out what the file size really is.) If you have a very large .mobi file size, the file size will cut into your delivery cost if you choose a 70% royalty (for an extremely large file size, you might see if the 35% royalty is actually better since that involves no delivery fee); the delivery cost is 15 cents per MB (subtracted from your 70% royalty; the customer doesn’t pay a delivery fee) in the US. You can upload a file as large as 650 MB. I’ve never had a file larger than 50 MB; I suppose if you add a bunch of video clips that generous limit will come into play (and that would be a hefty delivery fee, definitely needing the 35% royalty option). It’s not just the delivery fee that matters. At some point, it takes significantly longer for customers to download and takes up more room on the customer’s device. A few MB aren’t a problem. 50 MB is rather significant. Somewhere in between, maybe around 20 MB, is where you might start to have concerns, but if your book provides good features, like awesome images or video clips, the content may make it worthwhile.
OPTIMIZING TEXT FOR THE KINDLE TEXTBOOK CREATOR
With regard to text, I changed a few things (see the list at the end of this section for more details):
- larger font size for easier reading without having to pinch-and-zoom to read
- removing the gutter (i.e. it looks funny to have a larger inside margin in the e-book)
- narrower margins to maximize the use of the space on a limited screen size
- narrower page size to more closely match the target e-reader device
- use of color to help key terms stand out better
Many textbooks have 8.5″ x 11″ pages with a size 12 font. That’s great for the printed page, but just imagine if that page gets compressed onto a smaller screen. In that case, the text would be unreadable on many devices except when the customer uses pinch-and-zoom. If the customer must pinch-and-zoom (and then scroll around to read left to right, top to bottom) to read every page in a long e-textbook, that will quickly become tedious.
For many textbooks, it wouldn’t be too much work to reformat the file with a larger font. It depends in part on the complexity of the design and in part on how much attention you like to put into typographic features like widow and orphan control. (A nice thing about using the Kindle Textbook Creator is that you can use the same font from your print book—though you should check on the font licensing, which may be more strict for an e-book than it is for print books—and you can preserve typographic features like kerning and hyphenation. However, it wouldn’t be suitable for a book that mostly consists of text, like a novel.)
I originally published two print editions. One of the print editions has large print. The cool thing about increasing the font size and making a second version of your print file is that you can use it (A) for a large print paperback edition and (B) optimizing the text for the Kindle Textbook Creator.
However, I still made some changes to the file from my large print paperback edition to my Kindle Textbook Creator edition. I’ll get to that shortly.
My original file was a Word document (.docx). I first formatted this for a 6″ x 9″ paperback, and converted this to PDF.
Next, I saved my Word file with a new filename, increased the font size for the large print edition, went page by page through the file to improve the formatting (since the layout changed significantly after increasing the font size—I also made the large print edition 8.5″ x 11″, which is very transparency and document camera friendly on top of having larger print), and converted this to PDF for the large print paperback.
Finally, I saved my Word file with a third filename, and reformatted this for the Kindle Textbook Creator edition. Here is what I did to optimize the text:
- I made the font size very large. I used a font size of 24-pt for the body text. This may have been overkill: Size 16 or 18 pt may work well enough, depending on the font style. Try out a test page, convert the test page to PDF, upload that to the Kindle Textbook Creator, and preview how it looks on different screens; and repeat as needed until you’re satisfied with how the size looks. If the font size is readable across most devices, customers won’t have to pinch-and-zoom on every page just to read your e-book.
- If you used Word’s built-in styles (in 2007 and up for Windows, you find these on the top right half of the Home ribbon), changing font size is very simple. I simply changed the body text styles to 24 pt and those sections updated automatically, then I changed headings to size 36 pt, and so on. Presto, Change-o!
- I also changed the page size from 8.5″ x 11″ to 7″ x 11. Most print textbooks are 8.5″ x 11″, but that’s much squarer than most e-readers. The result will be large gaps at the top and bottom of the screen on a Kindle device. 7″ x 11″ is close to the aspect ratio of the Kindle Fire, but may be a little too narrow: It leaves small gaps at the right and left sides on an iPad. Obviously, you can’t get the aspect ratio to match every device, since e-readers have a variety of aspect ratios. 6″ x 9″ is common among trade paperbacks and probably comes out right without any adjustment. What’s your target device? You could either make the page size match your target aspect ratio, or you can compromise and use an aspect ratio that’s somewhere in the middle of what e-readers have to offer.
- Kindle Fire HD’s have an aspect ratio of 5:8. Starting with an 8.5″ x 11″ book, if you change your page size to 6.875″ x 11″, it will match the Kindle Fire HD.
- iPads have an aspect ratio of 3:4. Starting with an 8.5″ x 11″ book, a page size of 8.25″ x 11″ matches the iPad. It’s probably not worth the hassle if your main target is iPad, but 8.5″ x 11″ will look very square on the skinny Kindle Fire.
- Somewhere in between, like 7.5″ x 11″ may offer a good compromise.
- Another option is to find a Mac, format a separate file for iBooks designed around the iPad, and publish a Kindle edition designed for the Kindle Fire HD. (Note that iPad users do buy Kindle e-books and use the Kindle for iPad app, though if you use a Mac to format an iBook, this gives you some nice formatting options for iBooks.)
- I made the margins narrower for the e-textbook than I did for the print editions. Wider margins come in handy for making notes in a print book; that margin is pretty useless in an e-book (where you can add notes without having to use the margins). I left a small margin for aesthetic reasons.
- Most print books have a larger inside margin than outside margin, sometimes referred to as a gutter (though Word lets you make a wider inside margin, add a gutter, or both). This looks funny in an e-book. If your print book is like this, you can adjust your inside margin to match the outside margin (with the gutter field in Word set to zero).
- In the print edition, I used boldface to help key terms stand out. In the Kindle edition, I used color text to make them stand out even more.
- I removed the page headers from the Kindle edition. I could have kept them: Sometimes it’s nice to look at the top of the page to see what chapter you’re reading. But it would be silly to have the name of the book on odd-numbered pages and the chapter title on even-numbered pages in the e-book. If I had opted to keep the page headers, I would have made every page header show the chapter name (which really isn’t hard to change).
- I plan to add video clips for a separate interactive edition at some point. Presently, it looks like video is only compatible with third-generation Kindle Fire devices, so I’ve saved my interactive edition for last since that narrows the audience significantly. On the other hand, there aren’t many e-books with video, which could help yours stand out. (You might want to add clear notes in the description and near the first video clip so that customers on other devices aren’t surprised to learn about features not working for them.)
- I also made changes for images and for navigation, as I describe in the following sections.
If you have a very complex layout, or if you are meticulous with the subtleties of typography, changing font size, page size, or margins can become very tedious. But for many books, it’s not too much work to make a better reading experience.
Toward the end of this article, you can find some images that illustrate the changes that I made to my file for the e-textbook version. And, of course, you can check out my Kindle e-book (find the link in the first section—see above, and also read the note near the link regarding the Look Inside and sample).
OPTIMIZING IMAGES FOR THE KINDLE TEXTBOOK CREATOR
Amazingly, KDP’s FAQ’s for the Kindle Textbook Creator don’t specify a recommended image size.
I’ve spoken with the Kindle Educational Team, and with a few other authors who have asked Amazon, and those recommendations were insane, like 4000 pixels, which is overkill. I suspect those recommendations are made with future-proofing in mind. Even in the reasonable future, 2000 pixels should be ample resolution, maybe even that’s too much. Many images 1000 pixels across forced to display full-screen appear fine on a screen 2000 pixels across, and right now it’s hard to find a screen measuring more than 2000 pixels across.
Most authors using the Kindle Textbook Creator already have a PDF file for their print book, and almost all print books require or recommend 300 DPI. If your image is 300 DPI, even a small book size like 5″ x 8″ will be 2400 pixels along the longest dimension if the image is full-page. You don’t really need 300 DPI.
But let me back up. Forget DPI for a moment.
Here’s what I do: I take my print-ready PDF, upload it to the Kindle Textbook Creator, save it as a .kcb file (you don’t have a choice), don’t change the file at all, check how the images look in the preview, package the book for publishing (this creates a .kpf file; you don’t have a choice), login to KDP, upload the .kpf file, preview the images there also, complete the minimum info so that I can move onto page 2 of the publishing process, and look underneath the pricing table to find the converted .mobi file size. (Don’t waste time doing anything to your file or filling out the fields carefully. All this work is just to see what the file size is, to help you determine whether or not it’s even worth fussing with the images. We’ll go back to square one and do everything right later.)
If your print PDF was 300 DPI and your converted .mobi file size that you see on page 2 of the publishing process is reasonable, leave well enough alone. 300 DPI on paperback sized pages should have ample resolution for your e-book, and if the file size is reasonable, it’s probably not worth a lot of effort redoing images to try to trim the file size. (But if you noticed problems with how your images appeared in your preview, that might be worth addressing. It could be because the device you’re viewing the preview on has limited resolution, though most monitors should measure enough pixels across for that not to be an issue, so chances are that if your images look blurry, it’s worth looking into the cause. Do they look sharp in print?)
In most cases, your print-ready PDF’s images will be fine for your e-textbook, and you won’t need to resize them.
Of course, what really matters for an e-book is the number of pixels. DPI is irrelevant for e-books. But what I’m saying is that if you already have 300 DPI images suitable for a print book, that’s probably plenty of pixels for the e-book.
Now forget the file that you just made. Go back to your source file, save it with a new filename for your e-book version, and touch it up for the e-book. At the end of the previous section, I listed a variety of features that you might change for the Kindle edition. If you also want to adjust any images, make these changes when you change the page size, margins, font size, or anything else that you elect to change.
If you want full-screen images for the e-book, first you have to realize that it’s inherently impossible for them to fill the screen on every device because different devices have different aspect ratios. The best you can do is choose on device to target, like the Kindle Fire HD 8.9″, which is 1200 x 1920. But that will look narrow on an iPad, which is 1536 x 2048. But the iPad size will look short and wide on the Fire.
For the image to be full-width or full-height on a device, it must be full-page in your PDF file, i.e. there should be no margins around it. Unlike a print book, you can actually have pages of different size. So you could take your .jpeg image file and convert it to PDF, then insert that PDF image into your .kcb file with the Kindle Textbook Creator, and that image size can be, say, 6.875″ x 11″ (with the Kindle Fire HD aspect ratio), while your other pages are 8.5″ x 11″. (It might look a little funny to suddenly see a different size page though. That’s something you can test out and get feedback on. I’m not saying you should do this; just that you can.)
In most cases, what images are good enough for print are more than good enough for e-books, so you probably don’t have much work to do with your images. Unless… unless you have a lot of square images, like for an 8″ x 8″ book, and you want to redesign them to be tall and narrow like the Kindle Fire. Square images don’t make effective use of the narrow Kindle Fire screen, so this could be worthwhile. But then you have a lot of work to do. It might not be worth all that work if you have many images. (Don’t just change the aspect ratio as that will distort your pictures: You need a redesign, or just accept the square images and leave it at that.)
Design Tip: Browse for print replica e-textbooks on Amazon and check them out. You can see the different possibilities. You’ll probably see some samples (remember, any Look Inside may be showing the print edition; if so, you need to download the sample to check the formatting out). Traditional publishers don’t use the Kindle Textbook Creator, so you may find some print replica files that were made another way, but you’ll be able to find design ideas. And you’ll probably encounter some design problems, too. Sometimes it’s good to experience those as a customer before designing your own e-book.
The absolute best measure of how your images look comes from actually seeing your e-textbook on a device. The preview helps, but nothing is better than the real thing. Once you publish your e-book, the best thing is to be your own first customer and see exactly how it looks. (In the worst-case scenario, you can quickly unpublish until you can resolve the issue.) Of course, there are many different devices, but something is better than nothing. If you don’t have a Kindle or iPad, maybe you can find a family member, friend, or even a coworker who does.
OPTIMIZING NAVIGATION FOR THE KINDLE TEXTBOOK CREATOR
Note that there is a distinction between a table of contents and navigation.
- A table of contents is an actual page in your book. In many e-books, the table of contents has clickable hyperlinks (but not when you use the Kindle Textbook Creator).
- Navigation refers to a different sort of table of contents. Not one appearing as a page in your book, but one that shows up on the device itself when the customer accesses the navigation feature. Customers can click on the navigation links to jump to any chapter of the book.
Note that Amazon refers to Table of Contents in the Kindle Textbook Creator when it’s really talking about device navigation.
This causes some confusion. You can’t make a clickable table of contents with the Kindle Textbook Creator. Update: The latest version of the Kindle Textbook Creator now supports hyperlinks (provided that you upload a PDF with fully functional hyperlinks), though this is still different from device navigation.
What you can do is build in navigation for the device. This is what Amazon is referring to when they mention Table of Contents in the Kindle Textbook Creator.
Adding device navigation is easy. Don’t bother trying to do this in your PDF; most likely that won’t translate to the Kindle Textbook Creator anyway.
When your PDF is ready for Kindle publishing, open it up in the Kindle Textbook Creator.
Go to the pages you’d like to bookmark for navigation, such as pages with chapter headers (like Chapter 5), and important front or back matter sections, like the Introduction. On that page, you’ll find a checkbox on the right side of the Kindle Textbook Creator, which says, “Include page in Table of Contents.” Check that box on any page you’d like to work in device navigation. In the space below the box, type the name of the chapter or section (like Chapter 4 or Introduction). Check your spelling carefully; you’d hate to have a typo in the navigation menu.
Remember, this won’t give you a physical table of contents as a page in your book, and this won’t give you a clickable table of contents. (You can still have a physical table of contents page in your e-textbook; that’s up to you. If you want one, you should put it there before you make your PDF. For the e-book, it’s not as helpful as a print book, since there is device navigation. But you can’t make the table of contents page clickable.)
Now there is a peculiarity in the way that the Kindle Textbook Creator numbers pages for the device navigation: The Kindle Textbook Creator numbers every page in order starting with 1. But many print textbooks number the front matter with Roman numerals (while some pages typically aren’t numbered at all), and then call page 1 the first page of Chapter 1. If your print book follows that convention, the page numbers shown on the pages won’t match the page numbers shown in the navigation menu.
You may not like Kindle’s page numbering, but you can’t change that (well, you can send in a suggestion to KDP). You can, however, change your book.
Here are your options:
- Eliminate the page numbers from your file before uploading your PDF. E-books don’t really need page numbers. Unless your textbook frequently says things like, “See page 42.” Then you either need page numbers, or you need to change it to say something like, “See Chapter 2,” or, “See Sec. 4.2.1.”
- Renumber your pages to match what the Kindle Textbook Creator does. (You don’t have to number every page. If there is a page number, change the numbering.)
- Leave it the way it is. Many customers probably won’t even realize that there is a difference. I wouldn’t pick this option unless changing the page numbers would be a major hassle. If you have many instances of page references like, “See page 101,” it could turn into a major hassle. (I now have the habit of writing textbooks where I’m very reluctant to refer to pages by number. I generally prefer to write things like, “as shown in Chapter 8,” as it’s more Kindle-friendly.)
Here is one more thing to consider: Did you insert any pages into, or remove any pages from, your file for the Kindle edition? If so, that will add to the challenge of making actual page numbers match up with the navigation page numbers.
Personally, I prefer to use Roman numerals for front matter, but then call Chapter 1’s first page whatever that number happens to be. For example, if I have 8 pages of front matter, they would be pages i thru viii, and the first page of Chapter 1 would be page 9 (but I don’t put actual numbers on all of those pages; check some traditionally published books to see what some of the common conventions are). Then this matches up with the Kindle Textbook Creator. Many textbooks begin Chapter 1 with page 1, however, and then it’s an issue.
You can check the navigation functionality in the Kindle Textbook Creator’s built-in preview function (but don’t expect to find it in KDP’s preview after you upload your .kpf file).
ADDING SPECIAL NOTES TO CUSTOMERS
You don’t have to, but you can add a note to customers, either in the description, a page in your e-book, or both.
Not all customers know how to use their devices. Not all customers are familiar with print replica format (that’s what the resulting e-textbook created from the Kindle Textbook Creator is called).
I would avoid including a note about the format or features unless there is a specific issue in your e-book that makes this worthwhile.
Let’s say that you have images that look great when the e-textbook is held in landscape mode, but on most devices are hard to make out in portrait mode. Some customers are in the habit of holding the device only one way, and it just doesn’t occur to them to try it a different way. On the page after your first picture where this is significant, you could insert a new page with note suggesting that a better reading experience will result from holding the device in landscape. (For most books, that won’t be the case; this is just an example.) You could even add a picture showing the device held both ways as a visual illustration of this.
Or maybe you’re using the new audio or video features that are only available on limited devices. You might want to clarify both in the description and in the e-book where the first audio or video clip is reminding customers that these features only work on certain devices (to try to prevent frustration).
EXAMPLE ILLUSTRATIONS
Here are some illustrations of how I modified my print file to create a different PDF to use with the Kindle Textbook Creator.

The image above shows a few differences:
- I used grayscale for the paperback, but color for the Kindle edition.
- The page numbering is different with my Kindle version redesign.
- I removed the page header for the Kindle edition.
- The image appears slightly larger on the Kindle screen.
- (Although the text appears slightly larger in the Kindle edition, it’s actually more than it seems in this side-by-side picture.)

In the above image, you can see that the Kindle edition has narrower margins than the paperback. That’s not automatic. I specifically changed my file to have narrower margins on the Kindle edition, where those margins are less relevant, but which waste valuable space.

The print edition includes practice exercises at the end of the chapter. You can write in the paperback, so customers may want space here for their solutions. However, you can’t write solutions in an e-book, so I removed this extra space from the Kindle edition, as shown above.
Also, the answer key for the paperback is at the end of the book, which is inconvenient for the Kindle edition, so I put the answers on the page after the problems for the Kindle version. Customers just have to turn the page to find the answers in the e-book. It’s easy to bookmark the answer key for the paperback though, so I tabulated the answers in their own section for the paperback.

You can see what I mean about navigation built into the device in the above illustration. I took this picture with my iPhone’s camera; it shows my Kindle Fire HD 8.9″ with the navigation window open. On the bottom left, you can see the Introduction followed by the chapter names, with corresponding page numbers to the right. Note that these page numbers are automatic, and only match the actual numbers shown on your pages if you go to the trouble to make them match.

The above picture isn’t a Kindle Textbook Creator e-book. It’s a paperback book showing that some print books have a wider inside margin than outside margin. That might look funny if not changed for the Kindle edition of an e-textbook made using the Kindle Textbook Creator.
Write happy, be happy. 🙂
Chris McMullen
Copyright © 2015
Author of A Detailed Guide to Self-Publishing with Amazon and Other Online Booksellers
- Volume 1 on formatting and publishing
- Volume 2 on marketability and marketing
- 4-in-1 Boxed set includes both volumes and more
- Kindle Formatting Magic (now available)

Wow, Chris – you’ve done a ton of work.
It occurs to me that this might also work well for How To books, not just textbooks.
Best of luck with your new versions.
Alicia
I have a new algebra book almost ready, but that will be reflowable. It will be interesting to compare the two. But either way, the print edition is more likely to be the one that sells.
Reblogged this on Chris The Story Reading Ape's Blog and commented:
More useful information from the Amazon Guru himself – heeeere’s Chris McMullen 😄
You should host a late night t.v. show. Great intro. 🙂
LOLOLOL
Chris, I didn’t read the whole piece, which looks to have a ton of helpful information, but stopped to send a sample of your trig book to my husband. He thinks it looks like a good review, so we bought it. Your fan–Carol
Thank you, Carol. You just made my day. I hope you find it helpful. 🙂
I have aspirations to create a e-cookbook so I’ve bookmarked this post, with thanks. 🙂
I hope it helps. 🙂
Hi Chris,
Thank you so much for this article! There isn’t much information out there on size or margins for the kindle textbook creator and you clarified alot of this. I greatly appreciate the time you took to write this..
Kind regards,
Gina
You’re welcome, Gina. Thank you for taking time to post a comment. 🙂
This post alone would explain your recent success with the Bloggers’ Bash 🙂
There’s so little info available on these more technical aspects of textbooks (or, in my case, children’s books). Thank you for putting it together.
Thank you (though I haven’t figured out what the Bloggers’ Bash is; woke up too early this morning, perhaps). 🙂
You were nominated for http://sachablack.co.uk/2015/08/01/the-winners-of-the-annual-bloggersbash-awards-are/ 🙂
I need to keep up with these things better. That’s cool. 🙂
Every blog on that list is amazing. Congratulations on your nomination, too. The Storyreading Ape is no surprise, that was nice to see. 🙂
Thanks 🙂
Yes, Chris is such a wonderful guy.
It’s not true that amazon won’t do a “Look Inside” for a KTC. Mine was up and running within 12 hours of the book being uploaded. The secret is you need a dedicated ISBN for the kindle book (which costs $$$). If you skip the ISBN in favor of an ASIN, then you don’t get a Look Inside.
Actually, that’s not quite true either. I just got a Look Inside for a KTC book published yesterday (for which there is no print edition). It has no ISBN, just the ASIN. This is a new feature just being implemented. I checked my other KTC books, and most don’t yet have a Look Inside, but they should roll out in the coming weeks. (Definitely, no ISBN is needed, since mine has a Look Inside without one.)
Pingback: Amazon adds interactive audio & video to Kindle ebooks « HoustonMedia Social Media Agency
How well are simple tables supported? This is the biggest problem many people (such as me) have with the old Kindle converter..even simple (not nested, not containing images) tables get mangled on some platforms. Of course everyone says to make them JPGs but then they aren’t searchable and the text can’t be highlighted or cut ‘n pasted…and with all the problems I’ve had using tabs, it is just very difficult to have formatted data.
Better than most other ways. Customers will be able to pinch and zoom.
Thanks for your reply. Are there any drawbacks or issues to be concerned about that you know of? In fact, I want to use even more tables and maybe even nest a few, the way people often do on webpages, for presentation reasons..
I know I need to really play around with this, but I don’t have a Windows computer easily available, so any tips could help me quite a bit.
I would limit the size of the table. It’s designed to help with textbooks with up to 8.5″x11″ pages in PDF format. Although it may accommodate larger, I would try to stick to this. When you read the book, it won’t be reflowable. Each page of your book will be one page on the device, that customers will see and can pinch and zoom on.
I see what you mean. I don’t remember right now, but in, let’s say MS Word, can you specific maximum table sizes in inches? Actually the current print size of the book, that looks perfect, is 5.5″ X 8.5″ …however some of tables are split between pages. When you say “not reflowable” does that have anything to do with tables being split between pages vertically? I thought that term was more about sentences being display horizontally, which is why you never use C/Rs like you do on a real typewriter. I remember back in the 80s I learned typing in school and switching to a word processor it took me forever to overcome the habit of hitting “return” all the time! 🙂
Oh, by the way, the PDF file I used for the print book on Createspace already shows tables being split between pages.
They will appear the same way in the ebook.
A dream come true!
Thanks for your help~
Good luck with your book. 🙂
Can you give me more information about the flashcards feature? My book has games that may benefit from this feature but Im not sure how to include it. Thanks!
I believe it’s an automated feature to aid with studying and may not work with all books. You should contact Amazon KDP for more info.
Pingback: Achievements, failures and RESOLUTIONS! | Meeka's Mind
Pingback: The anatomy of writing a book – Tolling Book
Very useful article at last on Kindle Textbook Creator. Hope you’re still watching these comments. I didn’t understand what you meant by the hyperlinks function. In the in-built viewer they seem to work. Although I see they’re not necessary for a TOC, I’ll need them for moving backwards and forwards to answer pages (in the print edition at the back of the book). Will these hyperlinks work across all verslons?
External hyperlinks should work in the actual book. However, I’ve had issues with internal hyperlinks which worked in KDP’s online previewer not working in the actual book.
I see. I’ve been thinking of placing the sound files from the ebook on my website as a single download for customers who buy it. A URL in the book would show the customer where to download.This is to avoid the large file size problems you mention and make the ebook more compatible with a wider range of Kindle readers. Does that sound feasible and does it also make sense to include the answer pages I mention above in the same pack? Does Amazon allow parts of an ebook hosted elsewhere?
I would first include the audio file with the book, upload it to KDP, and see what the converted mobi file size is after uploading; it might not be that big. You could also include the link for the benefit of readers who have devices for which the audio may not work.
I include my answer keys as part of the book. Many readers appreciate the convenience of this for self-study, checking kids’ answers, etc., but perhaps checking answers online is viable. Good luck with your book.
Hi
I also had an issue with hyperlinks. When uploading from a Word document, provided they work in Word they should work in Kindle, but if you upload a document to Kindle then edit it and insert hyperlinks, they won’t work. A pain, I know. The secret is to do all of your editing in Word first. Apparently if uploading a PDF it is easier to do something about hyperlinks later. By the way, on chapters and automatic table of contents, if you insert a page-break at the end of every chapter, Kindle create picks up on this and makes them into separate chapters, all you then have to do is to go through and title them all.
John H
You wrote that you removed the page headers from the Kindle edition…How did you do this? It is driving me crazy!!! Thank you.
I removed the headers and footers “for” the Kindle edition (I should have written “for”). I saved the original Word file, then edited my Word file with a new filename (so I would also have the original). I removed the headers and footers in Word, created a new PDF, and loaded that into the Kindle Textbook Creator.